Sunday, July 27, 2008

Making Bread


The other day at an estate sale I picked up this very simple bread tray. Antique reproduction if you will. It is pewter colored and has an engraving on the base of some men in a wheat field and it says "Give Us This Day Our Daily Bread." I don't know why I liked it - but I did. So, when one has a bread tray one should make bread!

(I do believe this is the first picture of me on this blog - hello everyone!)


Here's my preferred recipe for when I have a couple of hours to enjoy the kneading, punching, rising, kneading, baking, smelling, cooling process of making bread. It's great as a breakfast bread lightly toasted with some fruit or jelly on top.


I don't do the bread machine thing. If I'm going to go to the trouble to make brad - I want to really experience it! Besides, there is no where in this small apartment kitchen to store yet another kitchen appliance anyway.

Amish White Bread

2 cups warm water
2/3 cup white sugar
1 1/2 tablespoons active dry yeast (2 packets typically)
1 1/2 teaspoons salt
1/4 cup vegetable oil
6 cups bread flour


1. In a large bowl, dissolve the sugar in warm water, and then stir in yeast. Allow to proof until yeast resembles a creamy foam.
2. Mix salt and oil into the yeast. Mix in flour one cup at a time. Knead dough on a lightly floured surface until smooth. Place in a well oiled bowl, and turn dough to coat. Cover with a damp cloth. Allow to rise until doubled in bulk, about 1 hour.
3. Punch dough down. Knead for a few minutes, and divide in half. Shape into loaves, and place into two well oiled 9x5 inch loaf pans. Allow to rise for 30 minutes, or until dough has risen 1 inch above pans. (make sure you wait for the full rise - not just 30 minutes! I got impatient and my bread was a little flat :( )
4. Bake at 350 degrees F for 30 minutes.


Enjoy!

Friday, July 25, 2008

I just fell in love with a rug


Right now my living room is two colors. Brown and Blue (see picture). I've been wanting to add more color to the room but haven't yet seen anything that says "That's It!"

Until now.

I stumbled across these Kathy Ireland rugs on Apartment Therapy's website that deals with designs in kids rooms - but I think they're beautiful, not childish.

We have the Garden Girl Milk Chocolate rug and the Butterfly Fantasy Ocean rug. I think the butterfly one is beautiful - but probably too green. So, the Garden Girl one is going on my wish list. (Hey, Mom! Christmas present? *smile*)


It's a lot of color - but will be under the coffee table (might need to get rid of that table runner you see in the picture and get something else) and I think it'll give the room some variety. I could get throw pillows the colors of the fabrics. Right now the throw pillows are just the same material as the couch. (Fancy looking, but boring.) The Garden Girl also comes with a "sand" colored background rather than the "chocolate" - but I think that would blend in too much with my current carpet.

So, maybe they'll carry them long enough for me to save $200 to spend on a rug.

Wednesday, July 23, 2008

The Kitchen Junk Drawer. Or, I Forgot I Had A Garlic Press!

I picked up Green Housekeeping by Ellen Sandbeck at the bookstore the other day. I've been reading/skimming through it. I appreciate her thrifty approach to being green. It's less Martha Stewart and more "I'm busy but I still want my home neat and clean without using chemicals!"


The first part of the book is on organization and she suggested using cardboard from old food boxes (cereal, crackers, etc) to create your own custom drawer organizers. Recycling AND organization that doesn't cost me more than the cost of the tape I already have. I'm in.


So, I present to you my newly reclaimed kitchen drawer. The things I use the most I put up front. I rediscovered that I own such things as a garlic press, a biscuit cutter, and a cheese slicer. What treasures! And, now I don't have to go digging around the entire drawer for my 1/8 tsp measuring spoon - I just have to dig around the first little cubby hole on the right! Amazing. Really.

Materials


Before


After

The beaters for the electric mixer have always been a problem in this drawer as if they do not have their own "floor" space they do not fit - they can't be on top of anything else. I used to just shove stuff around until I got some empty space. Hopefully this will work better. I've got the little "grease catcher" for the George Foreman Grill on top of some corn on the cob holders (which will come in handy when I once again get my corn and worms this Wednesday *shudder*). I was looking for those corn things last week and couldn't find them in the drawer! Stuff that I rarely use (cake decorating supplies, the turkey baster) are way in the back.

Now go see what stuff you can take out of boxes in your cabinets so you can organize your junk drawer too! ,

Monday, July 21, 2008

For When You Need Chocolate Cake NOW


A friend showed me a link to a 5-minute chocolate cake you bake in the microwave. (No. Really) So, of course I had to try this out.


I whipped up a quick peanut butter frosting recipe to spread on top:

2 Tbs softened butter (room temp)
1/4 cup cream peanut butter
1/2 c powdered sugar
beat together
beat in 2-3 tsp of milk (room temp) gradually until you reach desired consistency.


Not counting the "let the cold stuff get to room temp" time - it probably took me 20 minutes to get the ingredients together, make it, wait for the cake to set, frost, and clean-up.


I thought this a very good cake for the chocolate craving you may get - I wouldn't bake 20 of them to take as your pot-luck contribution - but it was very good! I enjoyed it warm with the peanut butter slightly melting into the cake the most. And, of course, I recommend a nice cold glass or organic milk to go with this tasty treat!

Friday, July 18, 2008

Worms: 2; Nicole: 2


I guess I should update you on the corn situation. I did eventually find a nice web page that explained the whole "worm" situation to me. So, I bravely went in to husk (shuck? which is it?) the corn.


Ear One: No worm! Nicole happily peeled away the layers of husk setting them aside in dreams of tamales or corn husk dolls.

Ear Two: Confidently pulling away the husks -- when near the actual corn I see... a worm. A fuzzy green worm munching on MY corn. I was husking over the trashcan so I shake the worm off - do my best to NOT throw away the corn while repeating an "organic is good. organic is good" mantra over and over. Dutifully cut off the portion of the corn the worm had munched on (plus quite a few more rows . . .)

At this point I pushed the other two ears to the side and said I'd deal with them and their inhabitants later. (I also threw the husks into the trash as I couldn't remember which were the worm husks and which weren't - so don't expect a "how to make a corn husk doll" post anytime in the near future.)

I roasted up the corn. Sprinkled some butter and spices and such on it and popped it in the oven wrapped in tin foil. Cooked for about 30 minutes. I don't do well actually eating the corn off the cob - so I just cut the kernels off into a bowl, chopped up a tomato (organic of course), mix, salt, enjoy!


I finally braved up enough to face the remaining two ears the next day. The first one had the evidence of the worm (munched ends) but the last one was worm free. So, half and half. I feel as though I've accomplished some brave step in organic food! ;-)

My Favorite Things: Snack


On grocery store trips when I feel I can afford the splurge I buy a round of Camembert cheese (I do recommend the President brand pictured here), a fresh baguette, and some white wine.


This makes up my favorite nighttime snack.I like the baguette that is ready for me to bake at home because I can get it all warm and toasty and then spread that lovely soft cheese on there.


Yum.


In the picture I actually have Ginger Ale in the champagne glass because I didn't feel like opening the wine I had in my fridge - but - as long as it's in a pretty glass it still feels like a fancy treat. This is my very short blog post recommending a bit of a treat to make yourself feel a little bit pampered.

Wednesday, July 16, 2008

Organic Corn

At the moment there are four ears of fresh organic corn sitting on my counter. I must admit I'm a bit leery of touching them. Why? Because in the CSA newsletter this week was this small note: "Typically I have the workers cut the worm out of the corn, but we're so busy this week we probably won't get to it. No worries though. All organic corn has a worm at the end because we don't use pesticides." She even included a nice little graphic of two smiley face heads hugging. Right. I feel so much better now.


There's a worm in my corn? Where is it? Do I husk it first and then chop off the end? Which end? Do I need to do it NOW or wait until I'm ready to eat the corn and just little corn worm enjoy himself until then? Am I even going to want to eat the corn after I see the squiggly thing at the end? So many questions! And, google is not giving me satisfactory answers - so I come to you dear blog readers in search of answers to these troubling matters.

At this point I'm thinking I prefer pesticides where corn is concerned.

Tuesday, July 15, 2008

First eggplant, now okra


Another vegetable which I previously dismissed has been reclaimed! I've grown up in the south generally despising "southern vegetables" - okra being at the top of my list.


I had a bag in my CSA box a couple weeks ago though and knew I needed to do something with them. I found a lovely recipe for Indian-style okra on All Recipes and thought I would try that.


SO. GOOD.


You just melt butter in a skillet. Chop on onion and saute it until tender. Slice the okra and throw it into the mix. Sprinkle on cumin, coriander, ginger, salt, and pepper. Cook that for a few minutes - stirring often. Serve and enjoy!


I was quite sad when okra did not appear in my CSA box the next week.


You can find the full recipe with actual measurements and specific times here: Indian Style Okra


Friday, July 11, 2008

The Empty Space in My Bedroom

Here are a few pictures of what I have done so far in my bedroom.


Bedspread/Curtains/Pillows are all from Khols. It is not a color scheme I was looking for - but I fell in love. I made the headboard out of some MDF, quilt batting, fabric, and a staple gun. I wish I had taken "process" pictures, but oh well. I plan on doing something similar in my guest room - so when I get around to that I'll take pictures. The mirrors on the side of the headboard are from Kirklands. Lamp is from Steinmart. The cushion on the chest at the end is covered in the same fabric as the gold on the headboard.

I found the dresser at a consignment store and the beautiful print at a thrift store. The things on top are totally different now - I really should take an updated picture. I have some antique books up there now.


Just a close-up of the pretty lamp :)


So, yes, that's all pretty - but when I'm sitting in my bed I see this:

So I've been brainstorming what to do with the space - here is my original sketch:

The "big" frame in the middle will be a copy of my family tree. I'm having a calligraphist re-write it for me on pretty paper and such. Around that I'll put a collage of family picture in sepia tones. I have a few antique frames that I've collected from ebay - and am continuing the search.

The hardest thing to find is, of course, the chair. I don't' have much space there. I need it to bee green and/or gold, and I want an antique style (I drew a wingback - but I really want more of the style that is in the print over my dresser) - and I don't want to pay hundreds of dollars for it! ha.

I have the lampshade I want on the lamp on the table - but I still need the table....and the lamp. I also need the tall vase - which I believe I'll put in the corner by the dresser rather than where it is sketched at.

I'm kind of use to the white walls of the apartment - but I'm thinking about starching some fabric up on that wall - - if I happen to see the perfect print I'll probably buy it -but otherwise the white walls don't bother me all that much.

The calligraphist's samples should be coming in the mail any day now - so my next project is to figure out who to kick off the family tree so that it all fits in the frame I have....or break down and get the whole thing and just buy a new frame.

I'll keep you updated!

Saturday, July 5, 2008

Magazine Boxes

This project did not turn out quite how I hoped and I may re-do it eventually. For now I'm going to leave it alone though and I thought I would still share it with you.

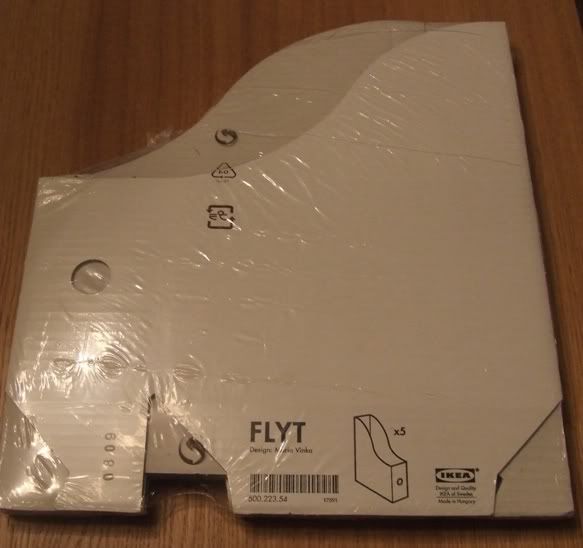
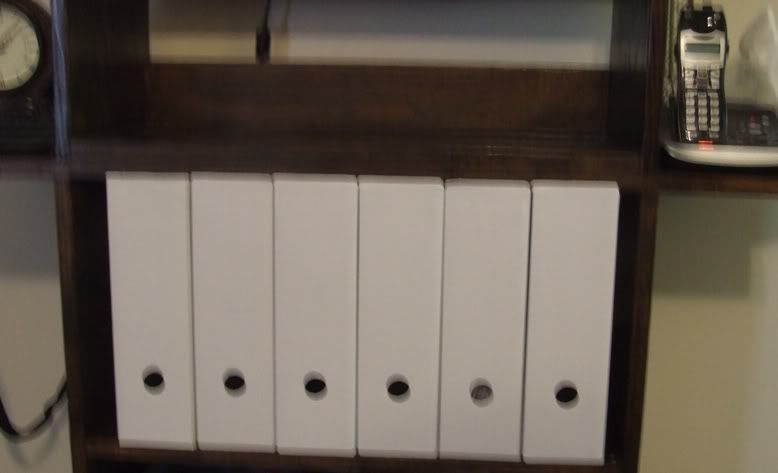
I ordered some plain white cardboard magazine files from IKEA. They look like this:


Not too exciting, eh?


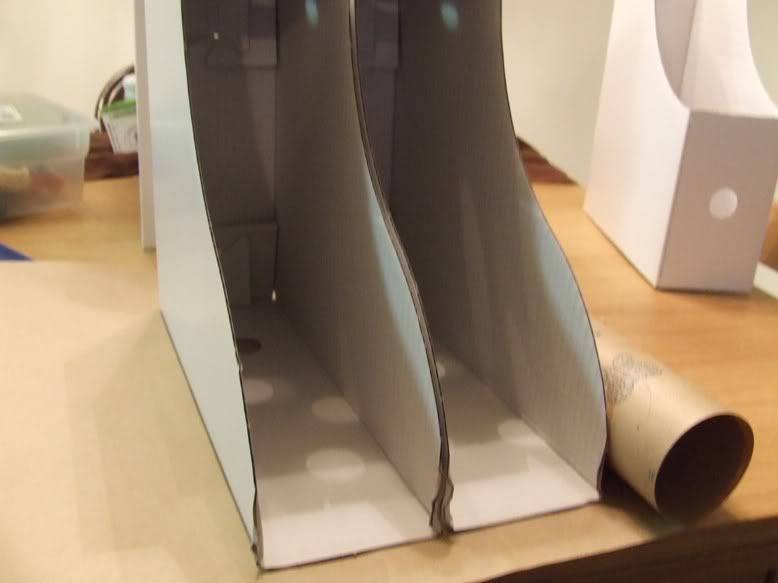
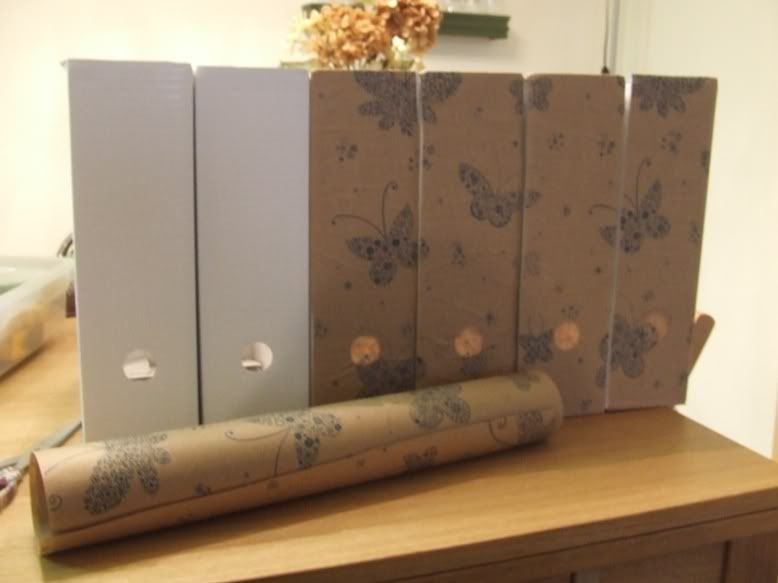
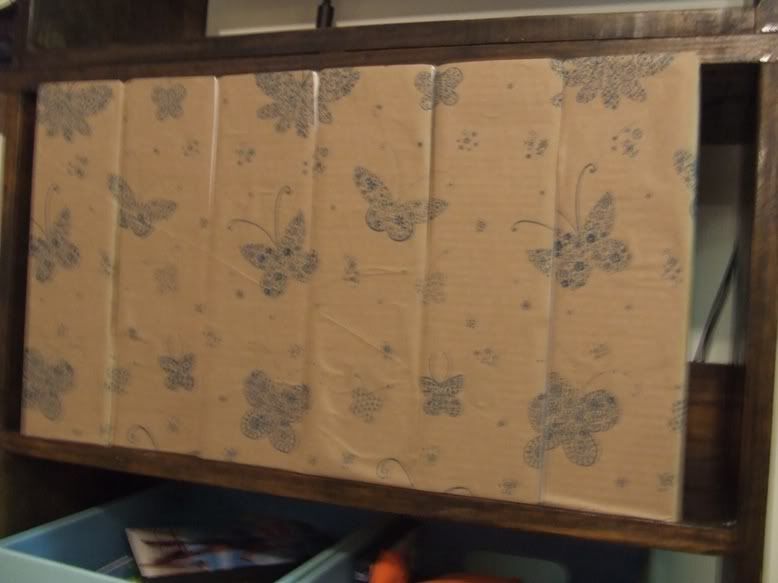
So, I found some wrapping paper that I thought would match my living room to cover the boxes. I picked one with a pattern just to make my life difficult in covering the boxes. So that the pattern would line up I traced out the end of each box onto the paper - for the two boxes that would be on the end of the row I also traced the visible side panel. I outlined the hole on the front of each box to help me line up the paper on the box correctly when it came time to glue.


Then, cut out each strip of paper and glue to the boxes (I used modge podge). If you're using a patterned paper - be very careful to line up the pattern. I messed up on the first one as you may be able to tell.


And, then you have a pretty little set of boxes on your shelf to hide away all those magazine you keep around for some reason.


Ok, so what I didn't like about my first attempt at this so that I know for next time (I still have some extra file boxes) or so that you don't repeat that mistake:


The paper was too thin (you see all the cardboard bumps) and not very bright and interesting on the shelf. If you're looking for something kind of understated - that would be good - but in my mind I wanted something that popped a little more. I was hoping the blue butterflies on the paper would've sparkled more.


I'm not very good at small details - so - I should've gone with coordinating papers rather than trying to match a pattern so the imperfections were not so noticeable. I also think I will cover all four sides of the boxes next time rather than just the visible ones so that I have more diversity in where I place them/how I group them.


Let me know if you try this and how your's turns out!

Thursday, July 3, 2008

I take back everything bad I thought about eggplant


So I was not very fond of eggplant. It looked funny. Felt funny. Smelled funny. Was a disappointing shade of dirty white that turned brown and old-looking fast once peeled. It doesn't really have a redeeming quality in and of itself.

However, I am getting two to three eggplants per week and I need to do something with them! So I went in search of some recipes. I stumbled across one on www.allrecipes.com with the rather presumptuous name of Eggplant Croquettes. I just called them "Eggplant Patties" in my head as I was making them as I did not think eggplant deserved such a dignified name.

I followed the recipe with the exception of adding cumin and baking the patties rather than frying them. (10 minutes on each side at 350 F)


oh. my. goodness.


Croquettes they are! These things are delicious! I was lazy and did not take pictures (thinking it wouldn't be anything to write home on the blog about anyway) but they are amazing! Go! Try them! If you're local I'll give you an eggplant!


As this is the single domestic - I did not cook up the whole batch but froze a few of them to enjoy at a later date.

I think I found a new favorite meal.

Wednesday, July 2, 2008

Ratatouille


I went looking for what to make with my eggplants from my CSA box and found a recipe for Ratatouille. Despite the fact that the movie of the same name rather creeped me out with the whole rats in the kitchen thing, I thought I would try out the recipe.


It's a VERY easy recipe. You just chop up the veggies and throw them all together. I did have to add some tobasco at the end because it wasn't spicy enough for me - so I think next time I'll throw in some peppers to the veggie mix.


I cooked up some plain white ricce to serve alongside of the dish and it was quite yummy!


Here's my new thing - recipe cards with all the info! Enjoy! Is it readable? I may have to try a different way of uploading the image. Let me know!