Sunday, August 31, 2008

Unexpected Purchase

Today I went to JoAnn's with my friend Michele to get some foam board for a project I'm trying to finish. I wondered over to the fabric section to see if anything struck my fancy as I've been searching for a print to upholster dining room chairs. I found that fabric - - and a beautiful fabric for curtains in my guest room. That room isn't decorated AT ALL and I've just been waiting to find that INSPIRATION piece -well, this fabric is it. I bought the fabric - and, of course, I needed a sewing machine to make the curtains - so I bought a sewing machine.

Meet little singer:


That pin cushion on little singer is my first project with this machine. I made it because I needed a pin cushion and it was a good way to brush up on my rusty sewing machine skills. I was happy to find that most of it came back to me from the days of sitting at the kitchen table with my mother.

Here's how I made the pin cushion:

1. Sewed two "ribbons" of fabric for the ties. Pinned them and the squares of fabric together. Front side of the fabric on the inside, ties on the inside.


This is what it looked like on the inside of that pinning job:


2. Sew around the edges leaving about 1/4-1/2 of one side open for turning and stuffing.


3. Turn, stuff, sew the open edge closed. Stick in pins!


And, my fabric ties weren't long enough (next time, Nicole, measure first!) - so I sewed some ribbon on to the ends to that it would fit around my machine.


Voila! Pin Cushion!


Here's the fabric that will soon become curtains in my guest room:


I'm going to do curtains and some throw pillows in that and look for some bedding in a solid color that coordinates. I'm hoping to achieve "feminine" without being "girly". And, I like the vintage feel. The backing is a color close to the yellow butterfly. I got some cool buttons to add to the pillows as well.


And - since I'm overloading you with pictures - how about a couple more? I just went digging in my storage shed to find my crowning achievement in sewing. I was probably 4th-6th grade when I made this. This is one of those very vivid memories from my childhood - my mom and I working on this project. It's a satin nightgown and robe set for Barbie.

Please note the attention to detail by the darts in the gown. ha


I think that's enough for this long entry. Upcoming projects that I'll hopefully be able to post about soon:

  • The Blank Wall in my bedroom. The family tree is on its way here! So I'll just need to frame that and get the other stuff for the wall ready to go and that should be done.
  • Curtains and pillows for the guest room plus general cleaning, organizing, and de-cluttering of that room.
  • Getting dining room chairs and upholstering the seats.
  • Planning a fabulous Thanksgiving dinner - which for me means I pick a few traditional favorites and hunt down some new and exciting recipes to try.

Monday, August 25, 2008

Grandmama's Chocolate Layer Cake

A small disclaimer. I know the cake is ugly. It's lopsided. It's got some weird cliff effect going on. The sides of the cake aren't really iced all the way. But, it tastes GREAT! And, sad to say, this is one of the prettier cakes I ever made. It's not split down the center or anything and from a few angles it almost looks straight. If I were a cake decorator all of my cakes would end up on Cake Wrecks.


Enough of a disclaimer - - this is Grandmama's Layer cake that I ate whenever we journeyed to South Carolina when I was a child. She always had a cake under the cake plate (the same cake plate that now sits in my kitchen) - and it was either a pound cake or a layer cake 99% of the time.


I made the layer cake for my Bible Study ladies tonight and if there's anything left after that it'll be taking a trip to the teacher's lunch room at work tomorrow for them to finish it off. (With a slice reserved in the freezer for my mother of course).

For the cake part - Duncan Hines butter/yellow cake mix. Cool Completely - slice each layer in half so that you have four layers total.

Icing: Melt 1 stick of butter and 1/2 cup of milk.

Sift together two cups of sugar, 1 TBS flour, and 1/4 cup cocoa. Add to melted butter and milk.


Cook over medium-high heat and boil hard for 3 minutes.


Remove from heat. Stir in one tsp vanilla and one tub of milk chocolate icing. Allow to set until slightly thickened (still pourable).

Cut a piece of parchment paper to fit your cake plate. Put one layer of the cake on the cake plate. Pour icing over cake and spread to the edges


Repeat with all layers. Drizzle icing down the side and use a spatula to smooth over the edges. Icing will pool down to the bottom - use your spatula to spread this back up the sides of the cake.


Once covered - allow icing to cool and harden.


Trim off the excess parchment paper with the icing mess to make your cake a bit more presentable (and hopefully yours is not lopsided)


Enjoy with a class of cold milk or a hot cup of coffee!

Saturday, August 23, 2008

Preparing

Today I was standing in line at Starbucks and the white couple in front of me getting coffee had a 3-4 year old little girl with them that looked Chinese. It took every ounce of self-control in me not to tap the woman on the shoulder and say, "Did you adopt?" and then force her to the table with her coffee so that she could tell me everything. ha.

I know there are a number of adoption groups in my area - and even single-parent adoption groups. They encourage the "thinking and waiting" among us to join them - but I feel a bit silly going to those groups when I know I'm years from submitting paperwork. So - I'll just keep pestering the World Wide Web with my rambling posts.

I know I want to do this. It scares me. But I'm trying to make the best of my self-imposed time line and use it to learn and prepare and not to put it off under the guise of "ignorance is bliss."

One of the major things I need (want) to accomplish before I am a mother is to get my master's degree. I've been tossing about schools and majors in my head ever since I had my B.A. in my hand. I'm having trouble finding a school that offers the type of degree I want that is workable with my work schedule. I did meet someone at a class this summer who is pursuing the degree I'm interested in and she's doing it all online through VA Tech. So, I looked into that option - and I think I may go with that. The good thing about working and going to school is that I don't take too many credit hours per semester so the out-of-state tuition won't be astronomical all at once.

A master's degree is just something I'd like to have in general - but the pay increase with that degree will be of much help in supporting a family. And, I don't really want to be working on a master's once my child is here.

So, that's kind of my first step here in the process that I really need to start.

(Because someone will probably ask - - I am interested in pursuing a M.A. in Instructional Technology)

Friday, August 22, 2008

The Incredible Edible (Hard-Boiled) Egg

For some reason the whole "boil an egg" thing always evaded me. I never could remember how to go about cooking an egg that way. Without fail I'd call my parents and say, "One more time. How do you boil an egg?" I couldn't remember if you put the eggs in at the beginning or after it boiled. How long did you boil for? Covered or uncovered? How did you know it was done?

Well, a few weeks ago I got the brilliant idea to look up egg boiling in my trusty America's Test Kitchen Cookbook rather than once again calling the parents. They, of course, had a new way to boil an egg. I've tried it twice since then and both times they have come out perfect. (And I remembered how to do it without having to look up the directions!). I always seemed to get that green film around the yoke when I boiled eggs in the past. ATK promised that I would not with their method - and indeed I didn't.

How To Boil An Egg:

Place eggs in saucepan. Cover with water (water should be a couple inches above eggs). Add a dash or two of salt.

Bring to a boil uncovered over high heat. As soon as the rolling boil starts. Cover the pan and remove from heat.

Allow eggs to sit in covered pan for 10 minutes and then transfer immediately to an ice bath.

Let them sit in the ice bath for a couple of minutes. Then either peel them and eat or store in the fridge for up to a week.


And, just for fun - some more random egg facts about me:
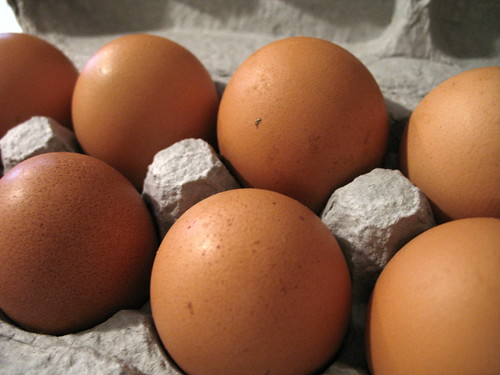
  • I've been eating organic eggs for so long now that I'm used to brown. I saw a white egg the other day and did a double take because it looked so funny to me. (Side note though - it's not the color of the egg that determines anything - the egg is the same color as the chicken's feathers. Typically though the free-range/grain-fed chickens are the brown ones and the ones that have to spend their poor lives locked in a cage are the white chickens).
  • When I take eggs out of the carton I pull the bottom left egg out first, then the top right, then the top left, then the bottom right - and continue to work my way in towards the center of the carton. I have to keep the carton balanced. It really bothers me if there is an odd number of eggs in the carton and I've been known to find a use for the odd egg. When I lived with other people (family, roommates) who obviously did not understand the delicate balance an egg carton requires, I'd regularly re-arrange the eggs. I have gotten a little more ok with the odd egg thing in the past few years - but I still kind of breathe a little sigh of relief when I can take that odd egg out and the carton is balanced.


Monday, August 18, 2008

New Blog

So I'm becoming one of those people with multiple blogs


check out this one for a different area of my life: http://thesingledomesticadopts.blogspot.com