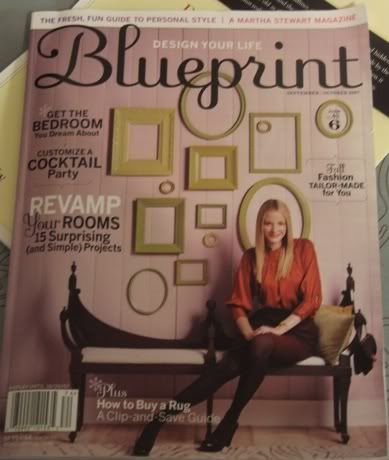
My inspiration was, again, the cover of the Sept/Oct Blueprint Magazine (see previous entry)
I pulled my colors from a picture I currently had in my dining room.
The cost breaks down something like this:
Frames and Glasses: less than $12. (I have leftover frames)
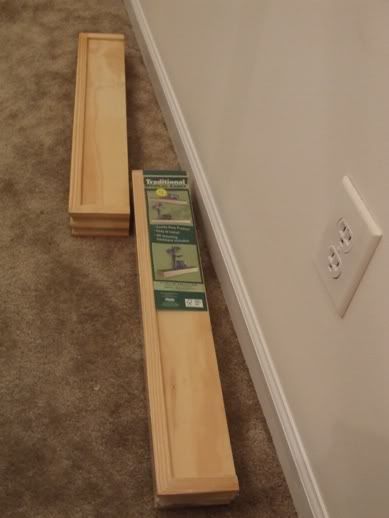
Wall Ledges: $4Candles: $7
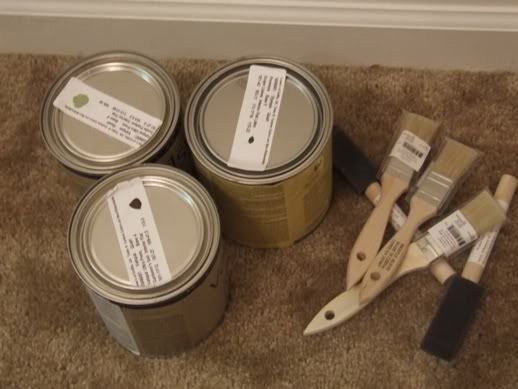
Paint: - I have almost a full can of each color left over (I bought a quart of three colors) – so we’ll say I used about a dollars worth of paint. If I were to do it again I would try and get those “sample” jars you can buy at some paint stores now – because I spent $30 on paint. I foresee more brown and green projects in my future!
Total for supplies actually used: less than $30
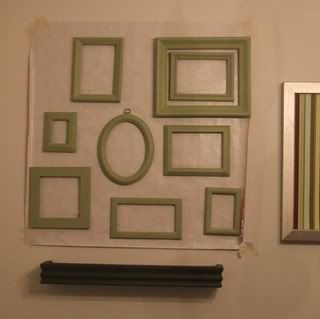
1. Figure out how the frames should be arranged. I knew nailing a million holes into my wall was not the best way of doing that – so I laid them out and Wilbur helped me choose:
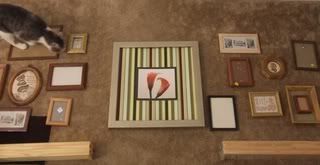
2. Trace the “layout” onto wrapping paper. This way I could remember what went where. This also insured that my frames were covering basically the same surface areas so that the groupings “matched”.

3. Hang paper on the wall - and make sure that each grouping is hopefully evenly spaced between the corners and the center picture.
4. Paint the frames! I needed to do two coats – though after one coat they would’ve fit nicely into a “country” “antique” décor style. Also – be sure to pull out those staples that are often in the backs of frames. And, you need to pain the insides of the frames – where the boards typically are because depending on that angle you’re looking at the collage you’ll see exposed wood if it is not painted.
5. Use your tracings as a guide and hammer the nails through the wallpaper and hang the frames over the paper. Unless you were very meticulous about both tracing your frames level and hanging the wrapping paper level – I strongly recommend the use of a level for this part. My right side wrapping-paper was extremely off and if I had followed it everything would be going downhill.
6. Now that all your nails and frames are in place – it’s time to take down the paper! I started at the top and just worked my way down a couple of frames at a time.
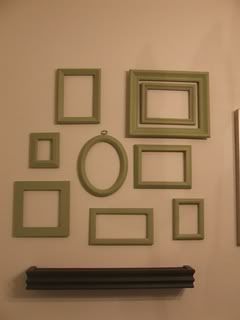
7. Complete the same for the other side – and then you have your final masterpiece! I'm still not completely happy with the right side - but I'll tweak it - I'm happy for now!
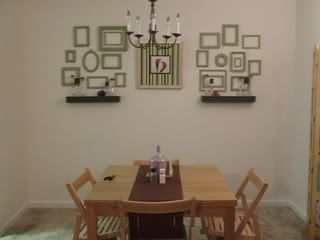
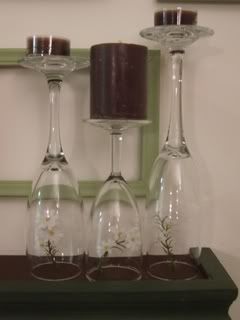
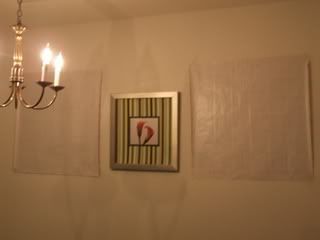
I added wall ledges below my collage – and put inverted wine glasses on the ledges. There are candles on top and flowers under the glasses. One of those things will probably go – not sure which. I’m not sure I like the brown color of the candles – I was trying to tie in my brown dishes/table runner – we’ll see if it grows on me. I will also probably never light a candle that close to the wall – so we’ll see.
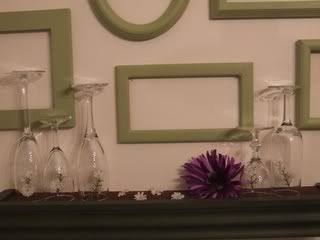
Here is a close-up of the ledges:
Without candles:
With candles: